Steps to create a user as a team member
Create a role
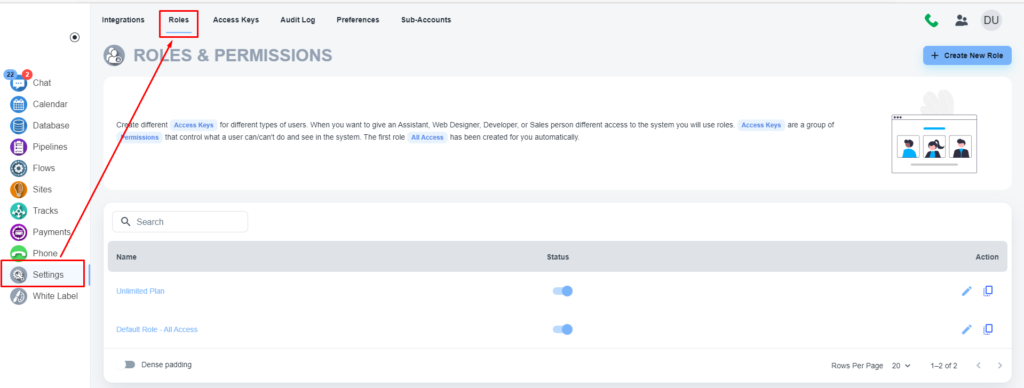
Please, navigate to the �Settings� on the left menu bar. Once the page is opened, please click on the �Role� menu on the top bar.
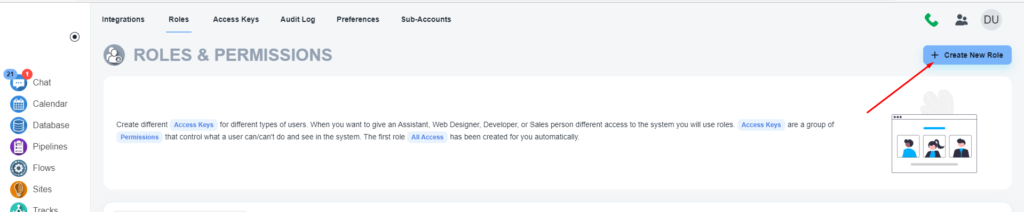
Please, click on the �Create New Role� button to create a role
Please, provide the access as per your requirements
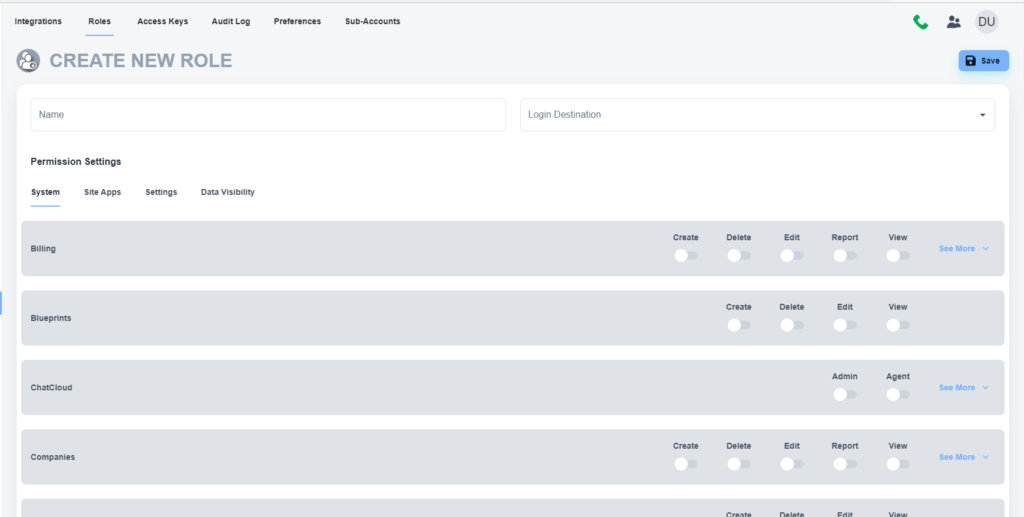
💡 No need for this step if you want to provide users with full access to your account. Please use the �Default Role - All Access� .
Create a contact for your user (optional)
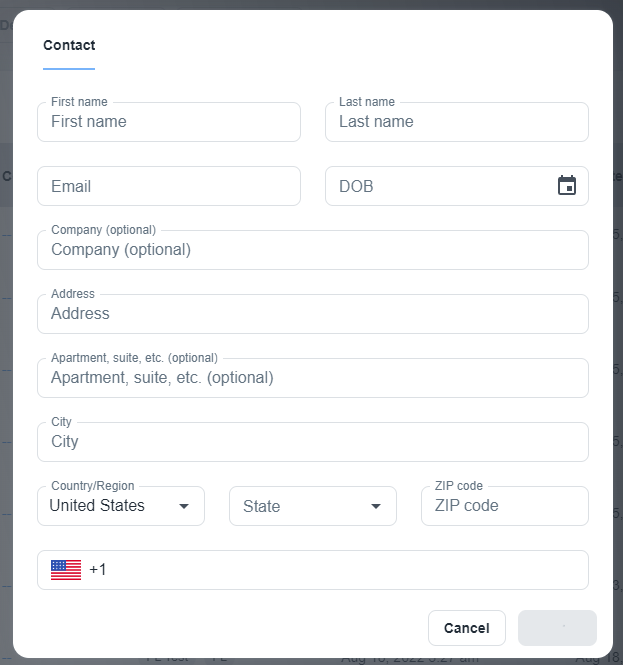
Please, create a contact for the user if you don�t have that already. Please, click on the �Database� menu on the left menu bar. Once the page is loaded, click on the �Create Contact/User� button.

💡 You can ignore this step if you have an existing contact already.
Create the system user
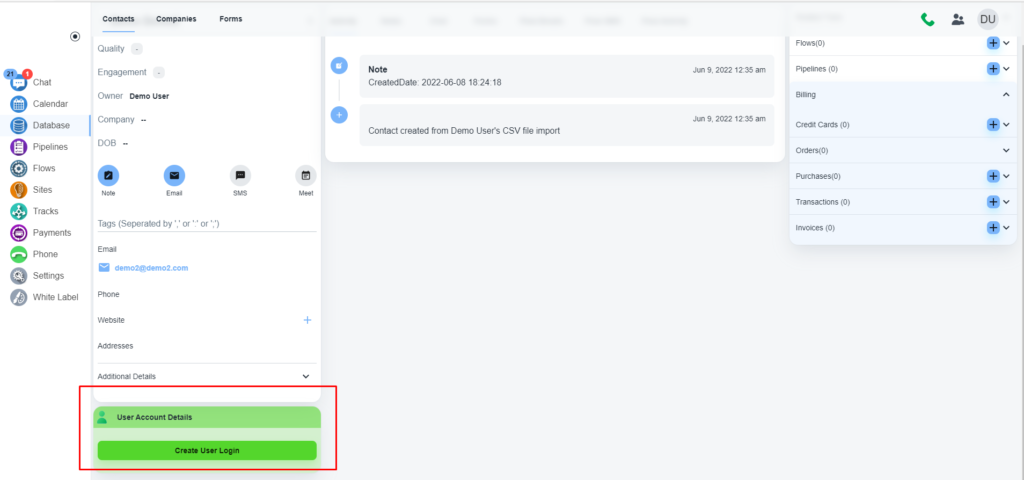
Please, open the contact you want to convert as a team member. On the contact card, you will have the option to create a system user.
Assign, password, role, etc. for that contact.
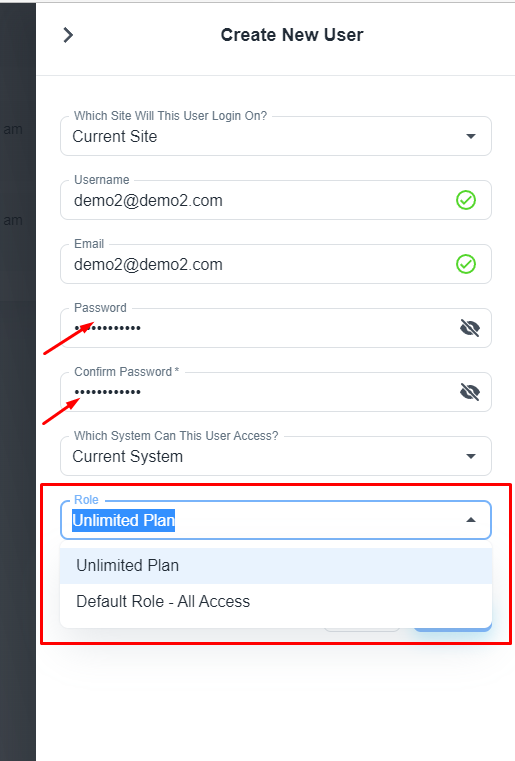
Please, choose the correct role and save the settings.